This week's challenge was: Sew Something Red!
I made a phone stand/pincushion.
I started with this really cool stick figure fabric that I've been hoarding for a while.
I really wanted to be sure you could see these kitties.
I cobbled this together from a lot of different phone/tablet stand tutorials. I started with a rectangle 9.5" x 10", folded in half to 9.5" x 5". Do NOT sew as below- or you won't get a pyramid. Sew that bottom seam, leaving a space for filling, and the seam on the right, also leaving a space for filling later.
My space for the bottom channel is smaller, maybe half an inch. Big enough to get my funnel into. The one for the other side is a little bigger, easier to stuff fiberfill into. Again, ignore that seam on the left that's WRONG.
What you want to do instead, is to leave that entire top half open, then refold it so that your side seam is in the middle of your closed tube.
When you turn it right side out, you get a little pyramid on the end.
Now you create the bottom support and channel. I drew a pencil line 3 inches up from the bottom and top-stitched along that line, then two more lines a quarter-inch farther towards the bottom - so a 2.5 inch total width for the channel.
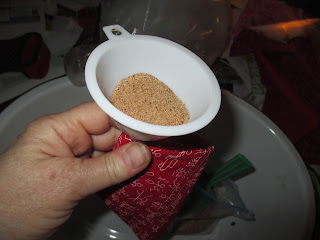
Now, time to fill! Most of the tutorials suggest rice, but since I have access to crushed walnut shells, that's what I use.
I did this inside a tub to contain any spills. I stuffed a little fiberfill into the end first.
Pour the walnut shells in- they don't want to go all the way in, so I use a chopstick to push them in.
I also finished with a little soft stuffing- fiberfill was just too hard to get into the smaller opening, so I started using scraps of batting, which worked much better.

Sew that closed, and you have your sturdy base/handy pincushion.
I stuffed the bigger top part with mostly fiberfill, but also added some walnut shells to give it a little more weight, and it's done.


No comments:
Post a Comment